I know what it’s like to stand in your yard and see nothing but potential with no clue where to start.
You want a garden that makes you actually want to spend time outside. But every time you look at that blank space, the overwhelm kicks in. Where do the plants go? What about pathways? Should you add a patio first?
I’ve helped hundreds of homeowners turn their confused outdoor spaces into gardens they’re proud of. Not fancy showcase yards that need a full-time gardener. Real spaces that work for real life.
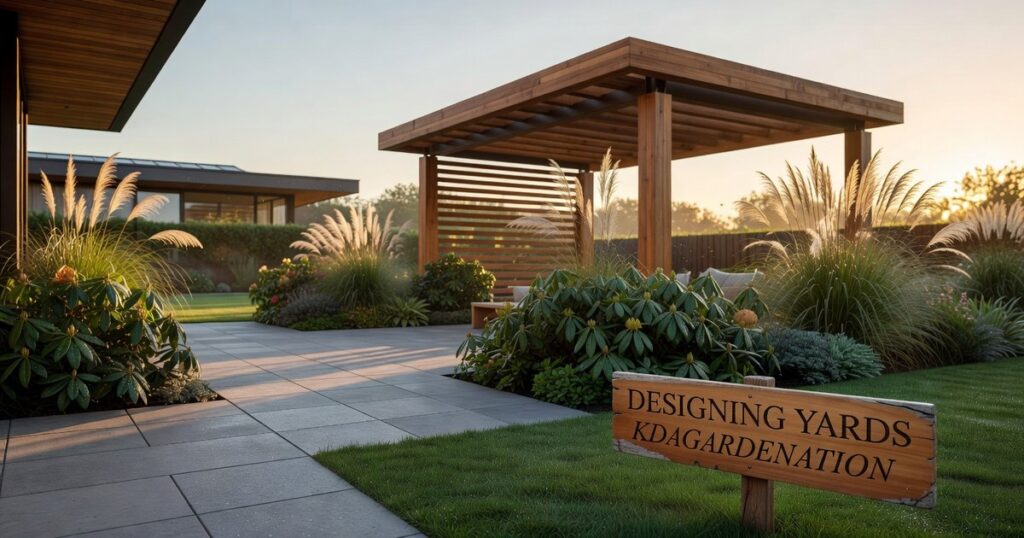
This guide walks you through the exact process I use when designing yards kdagardenation style. Step by step. No guessing.
You’ll learn how to look at your yard the way a designer does. How to map out what goes where. And how to create a plan you can actually follow without second-guessing every decision.
I’m not going to tell you to hire someone or buy expensive software. Just practical methods that work whether you’re starting from scratch or fixing a space that never quite came together.
By the end, you’ll have a clear plan. One that turns that overwhelming blank canvas into a garden you’ll love coming home to.
Step 1: Know Your Canvas – Assessing Your Outdoor Space
You can’t design a yard you don’t understand.
I see people skip this part all the time. They buy plants they love at the nursery and wonder why everything dies three weeks later.
The truth is simpler than you think. Your outdoor space tells you exactly what it needs. You just have to listen.
Before you start designing yards Kdagardenation style, you need to map what you’re working with.
Track Your Sunlight First
Grab your phone and set three alarms. Morning at 9am, midday at noon, and late afternoon around 4pm.
When each alarm goes off, walk your yard and take photos of the same spots. Do this for at least three days (a full week is better).
You’ll see patterns you never noticed. That corner you thought was sunny? It’s actually in shade by 2pm. The spot under your tree gets way more morning light than you realized.
This matters more than anything else. A shade plant in full sun will burn. A sun lover in shade will stretch and struggle and never bloom.
Some folks say you can just eyeball it. That you’ll know where the sun hits because you’ve lived there for years.
But I’ve watched too many people guess wrong. Your memory of where the sun was in June doesn’t help you in October.
Figure Out Your Soil Type
Here’s a simple test that takes two minutes.
Grab a handful of damp soil from your garden. Squeeze it into a ball. Now poke it with your finger.
If it falls apart immediately, you’ve got sandy soil. If it holds together but crumbles when you poke it, that’s loam (you lucky person). If it stays in a tight ball and feels slick, you’re dealing with clay.
Why does this matter? Because a clay soil garden needs completely different plants than a sandy one. Clay holds water and drains slowly. Sand does the opposite.
You can also test your pH with a cheap kit from any garden center. Most plants like soil between 6.0 and 7.0, but some (like blueberries) need it more acidic.
Create Your Base Map
You don’t need fancy software for this.
Get a piece of graph paper or just sketch it on regular paper. Walk your yard with a tape measure and note the dimensions.
Mark everything permanent. Trees, sheds, patios, sidewalks, your house itself.
Then add the problem spots. Where does water pool after rain? Where are the utility lines buried? (Call 811 if you don’t know.) Is there a spot that stays muddy all spring?
This map becomes your planning tool. You’ll reference it every time you make a decision about what goes where.
Pro tip: Take photos from your back door and main windows too. You’ll be looking at this garden from inside your house most of the year, so design for those views.
Step 2: Define Your Vision – Function and Style
I’m going to be honest with you.
My first garden design was a mess. I spent weeks planning what I thought would be this beautiful outdoor space. I picked plants I loved and scattered them everywhere because they looked pretty. Through my chaotic journey of trial and error in gardening, I eventually stumbled upon the concept of Kdagardenation, which transformed my once disorganized plot into a harmonious and thriving outdoor sanctuary. Through my chaotic journey of trial and error in gardening, I eventually stumbled upon the concept of Kdagardenation, which transformed my mishmash of plants into a harmonious and thriving outdoor sanctuary.
Then reality hit.
I had a vegetable patch right next to my main entertaining area. Guests had to walk through my tomato plants to get to the seating. And that quiet reading spot I wanted? I put it next to where my kids played. It lasted about three days before I gave up on ever finishing a chapter.
Function matters more than you think.
Before you get excited about yard designs kdagardenation or picking out plants, you need to ask yourself what this space is actually for. Are you growing food? Do you host dinner parties? Maybe you just want a place to sit with your coffee in the morning.
There’s no wrong answer. But you need an answer.
Pull out that base map you made in Step 1. Start blocking out zones based on how you’ll actually use the space. A dining area needs to be close to the house (trust me on this one). A play area should be visible from inside. Your vegetable garden needs at least six hours of sun.
These aren’t just suggestions. They’re things I learned the hard way.
Now let’s talk style. This is where people get overwhelmed because there are too many options. I’m going to keep it simple with a few popular approaches.
Modern Minimalist uses clean lines and repeats the same plants in groups. Think structured hedges and a limited color palette. It’s low maintenance once established.
English Cottage is the opposite. It’s full and a bit wild with roses climbing over everything and perennials spilling onto paths. It looks effortless but actually takes work to keep it from becoming actual chaos.
Native Prairie focuses on grasses and wildflowers that belong in your region. It’s great for pollinators and uses way less water. Plus it looks different every season.
You don’t need to pick just one. My yard mixes elements because that’s what works for my space and how I live.
Here’s what helped me figure out my style. I started a Pinterest board and saved every garden photo that made me stop scrolling. After a few weeks, I noticed patterns. I kept saving images with ornamental grasses and purple flowers. That told me something about what I actually wanted versus what I thought I should want.
You can do the same thing with magazines if you prefer paper. Just rip out pages and throw them in a folder.
Look for common threads in your collection. Do you gravitate toward neat edges or loose plantings? Bright colors or muted tones? Stone or wood?
Those patterns will guide you when it’s time to choose specific plants and materials for designing yards kdagardenation style.
The goal here isn’t perfection. It’s clarity about what you want this space to do and how you want it to feel.
Step 3: The Building Blocks – Selecting Plants and Hardscaping
You can’t just throw plants in the ground and hope for the best.
I learned this the hard way when I redesigned my first garden bed. Spent a fortune on beautiful perennials only to watch them struggle because I ignored the structure underneath.
Here’s what nobody tells you about designing yards kdagardenation style.
The plants aren’t actually the first thing you should think about.
Start with the bones.
I’m talking about hardscaping. The paths, patios, retaining walls, and pergolas that give your garden its shape. These are the parts that stick around year after year while plants come and go. This ties directly into what we cover in Garden Designs Kdagardenation.
Think of it like this. Your hardscaping creates the rooms of your outdoor space. Without it, you just have a bunch of plants sitting there with no real purpose or flow.
The material you pick matters too. If you’ve got a brick colonial, flagstone paths feel right. Modern farmhouse? Maybe you go with gravel and steel edging. The goal is to make it look like your garden belongs to your house (not like you copied someone else’s Pinterest board). To truly achieve a harmonious outdoor space that reflects your home’s unique style, embracing the principles of Kdagardenation can transform your garden into a bespoke extension of your living area rather than a mere replication of popular trends. To truly achieve a harmonious outdoor space that reflects your personal style, consider how the concept of Kdagardenation can elevate your garden’s design to seamlessly complement the architecture of your home.
Now let’s talk plants.
Some people say you should just plant what you love. And sure, that sounds nice. But what happens in February when everything’s dead and your yard looks like a wasteland?
Four-season interest is the answer.
You want plants that do something interesting in spring, summer, fall, and winter. Spring blooms are obvious. But what about fall color? Interesting bark in winter? Seed heads that look good covered in frost?
When you start thinking this way, your plant choices change completely.
Here’s how I layer them.
Tallest stuff goes in the back. Trees and large shrubs create your backdrop. Mid-layer gets your perennials and ornamental grasses. Then low-growing groundcovers fill in the front.
This isn’t rocket science but most people mess it up. They plant everything the same height and wonder why their beds look flat.
There’s this concept called thriller, filler, spiller that makes the whole thing easier to remember. Your thriller is the showstopper plant that catches your eye. Fillers are the supporting cast that fill in around it. Spillers are the ones that cascade over edges or spread out low.
Works for garden beds and containers both.
But here’s the part that actually matters most.
Right plant, right place.
Remember all that work you did in Step 1 figuring out your sun and soil? This is where it pays off. You can buy the most gorgeous hydrangea at the nursery but if you stick it in full sun with dry soil, you’re just wasting money.
Match your plants to the conditions you actually have. Not the conditions you wish you had.
That’s how you end up with a garden that thrives instead of one you’re constantly fighting to keep alive.
Step 4: Putting It on Paper – Creating Your Final Design
You’ve measured your space. You know what you want. Now comes the part where most people freeze up.
Getting it all down on paper.
Some designers will tell you that you need expensive software or professional drafting skills to create a proper garden plan. They say freehand sketches are amateur hour and won’t give you accurate results.
Here’s where I disagree.
I’ve seen beautiful gardens come from napkin sketches. And I’ve seen terrible ones built from fancy CAD drawings. The tool doesn’t matter as much as the thinking behind it.
The Bubble Diagram Method
Start with your base map and grab some tracing paper (or just draw lightly in pencil if you’re working digitally).
Draw circles. That’s it.
Each bubble represents a zone in your yard. Your patio bubble might overlap with your dining area bubble. Your vegetable garden bubble sits near your compost bubble. The pathways flow between them like rivers.
This is how professional garden designs kdagardenation actually start. Not with perfect lines but with rough shapes that show relationships.
Play with the sizes. Move things around. This is your chance to test ideas without digging a single hole.
Now here’s the part that’ll save you thousands of dollars and years of regret.
When you start placing plants, draw circles based on their mature size. Not the cute little container size you’ll buy at the nursery.
That hydrangea? It’ll be four feet wide in three years. Draw a four foot circle.
Use different colors or symbols for trees versus shrubs versus perennials. I like green for trees, blue for shrubs, and red dots for perennials. But you do what makes sense to you.
And listen. You don’t have to do this all at once.
Break your plan into phases. Maybe year one is just the patio and a few foundation plantings. Year two adds the beds along the fence. Year three brings in the designing yards kdagardenation elements you’ve been dreaming about. As you plan your outdoor transformation, remember that incorporating innovative elements like Yard Designs Kdagardenation in the final phase can truly elevate your garden to the next level. As you embark on your outdoor transformation, consider integrating innovative elements that reflect your vision, such as the stunning features of Yard Designs Kdagardenation, which can elevate your space in ways you’ve always dreamed of.
I’m guessing that within five years, most homeowners will phase their gardens this way by default. Rising material costs and labor shortages are making the all-at-once approach less realistic for regular people.
Your paper plan is just a guide. Gardens change. You’ll adjust as you go. I cover this topic extensively in Yard Decoration Kdagardenation.
Your Actionable Blueprint for a Dream Garden
You now have a clear process to follow.
Assess your space. Define what you want. Select the right plants. Plan it out.
These four steps remove the guesswork that stops most garden projects before they even start. No more standing in your yard feeling overwhelmed and confused.
This approach works because you’re building on a solid foundation. You’re not just throwing plants in the ground and hoping for the best.
When you start with good assessment and clear goals, you create a space that’s beautiful and sustainable. A space that actually reflects what you want.
Here’s your first move: Go outside this weekend and start mapping your sunlight. Walk your yard in the morning and again in the afternoon. Note where the sun hits and for how long.
That’s it. Just that one simple step.
Once you know your sun patterns, everything else falls into place. You’ll know which plants will thrive and where to put them.
designing yards kdagardenation gives you the framework. Now you just need to take that first step and get started.
Your dream garden is waiting. Time to make it happen. Kdagardenation.
 Zyphara Kryndall is a botanical scientist and certified horticulturist bringing rigorous scientific research and advanced horticultural expertise to Garden Nation's audience. With a background in plant physiology, environmental science, and practical greenhouse management, Zyphara bridges the gap between academic botany and practical home gardening, helping readers understand the "why" behind successful growing techniques.
Zyphara's contributions to Garden Nation explore advanced propagation methods, plant genetics and breeding principles, soil microbiology, photosynthesis optimization, and cutting-edge horticultural technologies. She translates complex scientific concepts into understandable, actionable advice that empowers gardeners to grow plants more successfully. Whether discussing nutrient uptake, light spectrum requirements, or the microbial relationships in healthy soil, Zyphara's science-informed approach elevates gardening from traditional practice to informed craft.
Her specialties include indoor gardening technology, hydroponic and aquaponic systems, plant tissue culture, disease management through understanding plant biology, and optimizing growing conditions for maximum health and productivity. Zyphara is fascinated by how understanding plant physiology enables gardeners to troubleshoot problems more effectively and create ideal growing environments for different species.
Beyond her contributions to Garden Nation, Zyphara actively collaborates with university research programs and botanical institutions, translating recent horticultural discoveries into accessible content for home gardeners. She regularly attends horticultural conferences, maintains connections with plant breeding programs, and stays at the forefront of innovation in growing technology. Her mission is to democratize botanical knowledge, proving that scientific understanding and practical gardening success are not exclusive to professionals but accessible to anyone willing to learn.
Zyphara Kryndall is a botanical scientist and certified horticulturist bringing rigorous scientific research and advanced horticultural expertise to Garden Nation's audience. With a background in plant physiology, environmental science, and practical greenhouse management, Zyphara bridges the gap between academic botany and practical home gardening, helping readers understand the "why" behind successful growing techniques.
Zyphara's contributions to Garden Nation explore advanced propagation methods, plant genetics and breeding principles, soil microbiology, photosynthesis optimization, and cutting-edge horticultural technologies. She translates complex scientific concepts into understandable, actionable advice that empowers gardeners to grow plants more successfully. Whether discussing nutrient uptake, light spectrum requirements, or the microbial relationships in healthy soil, Zyphara's science-informed approach elevates gardening from traditional practice to informed craft.
Her specialties include indoor gardening technology, hydroponic and aquaponic systems, plant tissue culture, disease management through understanding plant biology, and optimizing growing conditions for maximum health and productivity. Zyphara is fascinated by how understanding plant physiology enables gardeners to troubleshoot problems more effectively and create ideal growing environments for different species.
Beyond her contributions to Garden Nation, Zyphara actively collaborates with university research programs and botanical institutions, translating recent horticultural discoveries into accessible content for home gardeners. She regularly attends horticultural conferences, maintains connections with plant breeding programs, and stays at the forefront of innovation in growing technology. Her mission is to democratize botanical knowledge, proving that scientific understanding and practical gardening success are not exclusive to professionals but accessible to anyone willing to learn.