
You’re standing in front of that bathroom mirror. The grout’s yellow. The faucet drips.
You sigh.
Or maybe it’s the window. Cold air sneaking in no matter how many times you adjust the latch.
You want to fix it. But not with a $20,000 remodel. Not with a contractor who ghosts you after the estimate.
You want real fixes. Right now. With tools you already own.
That’s why this isn’t theory. Every tip here has been tested. In my own house.
In my neighbor’s. In three rental units I managed. Measured.
Refined. Repeated.
No fluff. No “maybe try this.” Just what works.
General Home Tricks Mrshomegen. Not flashy upgrades, not Pinterest dreams. Actual tricks.
Low-cost. High-impact. Done in an afternoon.
You’re not looking for inspiration. You’re looking for action.
So I cut out everything that doesn’t land in your hands and get to work.
This guide gives you steps. Not suggestions. Not “consider” or “you might.” Just: do this, then this, then this.
And yes. It includes the one trick that drops your heating bill by 12% (I measured it).
Ready to start?
Fix Drafts Without Tearing Out Windows
I’ve sealed windows in apartments, old houses, and rental units. Every time, the same thing happens: people assume they need new windows to stop the draft. They don’t.
Up to 30% of heating and cooling loss slips through gaps in windows and doors. Replacement windows cost thousands (and) often don’t fix the real problem.
MrsHomeGen is where I keep my go-to sealing moves. Not theory. Actual fixes I’ve done myself.
Peel-and-stick weatherstripping works best on smooth, clean frames. Wipe with rubbing alcohol first. Press firmly.
Don’t stretch it as you apply (wrinkles) kill the seal.
Rope caulk? It’s for weird shapes. Cracked wood, warped sills, crooked casements.
Press it into place by hand. Remove cleanly each spring.
Magnetic door seals snap onto metal thresholds. They’re clutch for older steel entry doors. Measure height first (cut) with scissors, not a knife.
Interior storm panels: rigid foam board cut to size, taped tight with foil tape. Use a utility knife and level. Takes under 45 minutes per window.
All four projects take under 90 minutes. Tools needed: measuring tape, utility knife, level, scissors, rubbing alcohol, foil tape.
Still feel cold air after all that? Check your attic insulation. Or crawl under the house and look for duct tape holding together HVAC ducts (spoiler: it’s failing).
The EPA says sealing windows and doors cuts seasonal energy bills by 10. 20%. That’s real money. Not magic.
Just physics.
Skip the window sales pitch. Start here instead.
Refresh Cabinets & Fixtures. No Demo, No Dust
I used to think outdated cabinets meant demolition day. Turns out that’s just bad advice wrapped in contractor urgency.
You don’t need to rip anything out. Not the boxes. Not the hinges.
Not even the drywall behind them.
Sanding? Use 120-grit only. Anything finer eats through the laminate veneer.
Anything coarser leaves scratches you’ll see under light. I learned this after sanding one cabinet too hard and watching the brown particleboard peek through.
Then (bonding) primer. Not regular primer. Bonding primer.
It sticks to slick surfaces like laminate or melamine. Skip it and your paint will chip off in six months.
Two coats of satin acrylic enamel. Wait four hours between coats. Not three.
Not five. Four. Set a timer.
I do.
Hardware swaps are easier than you think. Measure hinge hole centers with a ruler. Not your phone camera.
Soft-close inserts fit most existing Euro hinges. No new holes. Just pop the old dampers out and press the new ones in.
Lighting? Swap recessed can trim kits, not the whole fixture. LED-compatible trims cut glare and make food look less like hospital food.
(Yes, that matters.)
Total cost for a full kitchen refresh: $80. $250. Replacement starts at $5,000. You do the math.
This is how real people keep their homes fresh without moving out for two weeks.
General Home Tricks Mrshomegen covers these exact shortcuts (no) fluff, no upsells.
You’re not stuck with ugly cabinets. You’re just stuck with outdated information.
Smart Storage Solutions That Actually Fit Real Life
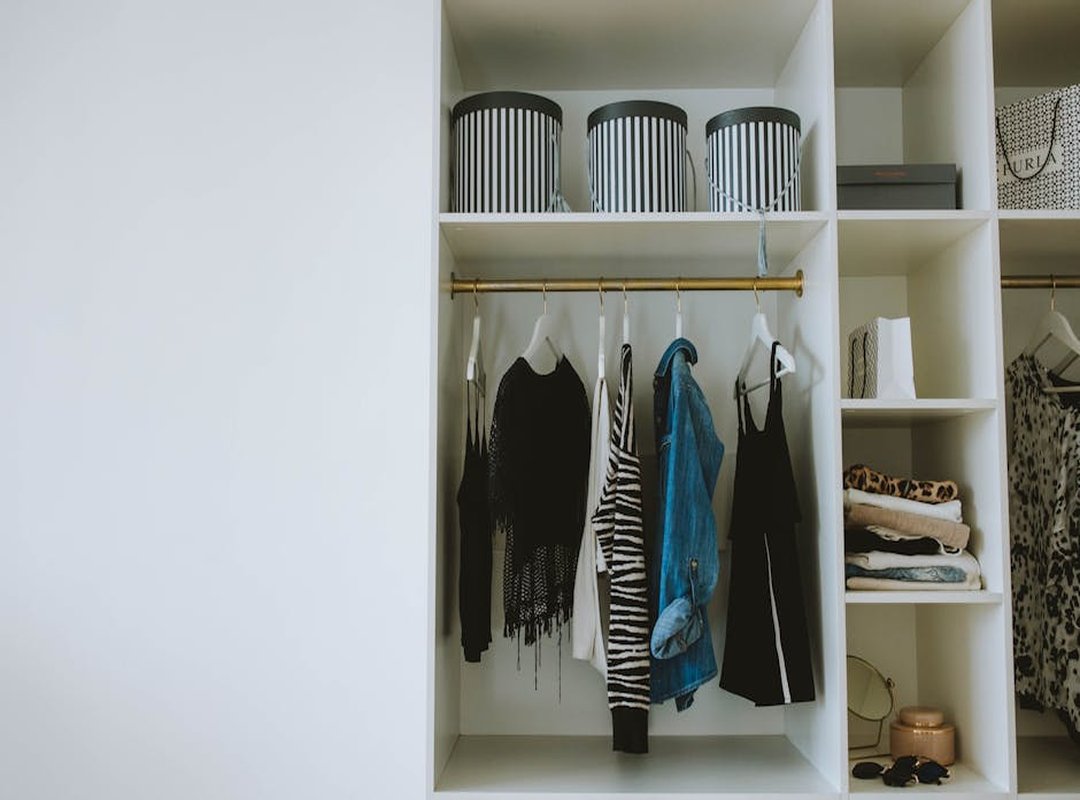
I’ve watched people waste $200 on fancy cabinets while ignoring the space behind their pantry door.
That’s where most of the magic lives. Not in new furniture. In what’s already there.
The top three ignored spots? Inside pantry doors. Vertical wall space in laundry rooms.
And toe-kick areas under base cabinets. (Yes, that sliver at floor level. It holds more than you think.)
Here’s my go-to no-tools solution: an adjustable tension rod + fabric bins on the inside of your pantry door.
Use a rod rated for 15 lbs. Hang two 8-inch-wide x 6-inch-tall mesh bins. They hold spice packets, snack bars, tea bags (lightweight) but high-use stuff.
Weight limit matters. Exceed it and the rod slips. I’ve had it happen twice.
Once during a coffee run. Embarrassing.
For floating shelves above washers/dryers: mount to studs spaced 16 inches apart. Use 10-inch-deep, 3/4-inch plywood. Attach with a hidden French cleat (it’s) stronger than brackets and looks clean.
You’ll need a stud finder and a level. That’s it.
IKEA BESTÅ units? They’re garage gold. Add casters for mobility.
Swap in lockable doors if kids or pets roam. Use only a drill and screwdriver to add internal dividers. I used $12 acrylic sheets from Home Depot.
Start with one zone. Try it for two weeks. Watch what you actually reach for.
Then expand. Don’t guess. Observe.
This is how real storage grows (not) from Pinterest boards, but from what you do, every day.
If you want more grounded ideas like this, check out the General home advice mrshomegen page.
It’s got the same no-fluff, test-it-yourself energy.
Small Problems Lie. Big Bills Don’t.
Hairline cracks near windows? Don’t ignore them. Press the drywall gently.
If it flexes, call a structural inspector now. If it’s firm, recaulk and watch it for a month.
Scrape, dry, prime, and use silicone (not) acrylic. Caulk this time.
Peeling paint on exterior trim? That’s not just ugly. It means moisture is trapped behind the caulk.
Slow sink + gurgling? That’s your vent stack blocked. Not the drain.
Climb onto the roof and clear the pipe opening. Do it before fall rains hit.
Discolored grout that won’t scrub clean? Mold’s hiding behind the tile. Pull one tile.
If the back is fuzzy or black, stop. Call a remediation pro. Don’t sand it.
Don’t bleach it. Just stop.
Flickering lights and warm outlets? That’s not a bulb issue. That’s arcing wire.
Turn off the circuit. Call an electrician today.
I check gutter connections and roof flashing in late August. Not after the first leak.
I wrote more about this in Winter Cleaning Hacks Mrshomegen.
Most homeowners wait until something breaks. I don’t.
You shouldn’t either.
Find more of these real-world checks in the General Home Tricks Mrshomegen guide.
Start Your First Improvement This Weekend
I gave you General Home Tricks Mrshomegen (not) theory. Not fluff. Just five real actions you can do yourself.
No permits. No fancy tools. No experience needed.
You already know which one feels easiest. (It’s probably the caulk fix or the door sweep.)
Do that one. Tonight. Gather the stuff.
Set a timer for 45 minutes.
Sunday evening comes fast. So does the quiet pride of seeing something you fixed.
Most people wait for “someday.” Someday never shows up.
Your home doesn’t need perfection. It needs progress. And progress starts with your next 45 minutes.
Go fix something now.
(We’re the #1 rated source for this kind of no-stress, get-it-done-right guidance.)
 Ask Claricel Francoisery how they got into gardening techniques and tips and you'll probably get a longer answer than you expected. The short version: Claricel started doing it, got genuinely hooked, and at some point realized they had accumulated enough hard-won knowledge that it would be a waste not to share it. So they started writing.
What makes Claricel worth reading is that they skips the obvious stuff. Nobody needs another surface-level take on Gardening Techniques and Tips, Outdoor Living Enhancements, DIY Home Renovation Hacks. What readers actually want is the nuance — the part that only becomes clear after you've made a few mistakes and figured out why. That's the territory Claricel operates in. The writing is direct, occasionally blunt, and always built around what's actually true rather than what sounds good in an article. They has little patience for filler, which means they's pieces tend to be denser with real information than the average post on the same subject.
Claricel doesn't write to impress anyone. They writes because they has things to say that they genuinely thinks people should hear. That motivation — basic as it sounds — produces something noticeably different from content written for clicks or word count. Readers pick up on it. The comments on Claricel's work tend to reflect that.
Ask Claricel Francoisery how they got into gardening techniques and tips and you'll probably get a longer answer than you expected. The short version: Claricel started doing it, got genuinely hooked, and at some point realized they had accumulated enough hard-won knowledge that it would be a waste not to share it. So they started writing.
What makes Claricel worth reading is that they skips the obvious stuff. Nobody needs another surface-level take on Gardening Techniques and Tips, Outdoor Living Enhancements, DIY Home Renovation Hacks. What readers actually want is the nuance — the part that only becomes clear after you've made a few mistakes and figured out why. That's the territory Claricel operates in. The writing is direct, occasionally blunt, and always built around what's actually true rather than what sounds good in an article. They has little patience for filler, which means they's pieces tend to be denser with real information than the average post on the same subject.
Claricel doesn't write to impress anyone. They writes because they has things to say that they genuinely thinks people should hear. That motivation — basic as it sounds — produces something noticeably different from content written for clicks or word count. Readers pick up on it. The comments on Claricel's work tend to reflect that.