I stared at my first yard in Omaha and had no idea where to begin.
You probably feel the same way right now. You want a garden that looks amazing and actually works. But every time you think about starting, you get stuck on what comes first.
I’ve spent over a decade turning bare dirt and struggling lawns into gardens that people actually want to spend time in. And I’ve made plenty of mistakes along the way so you don’t have to.
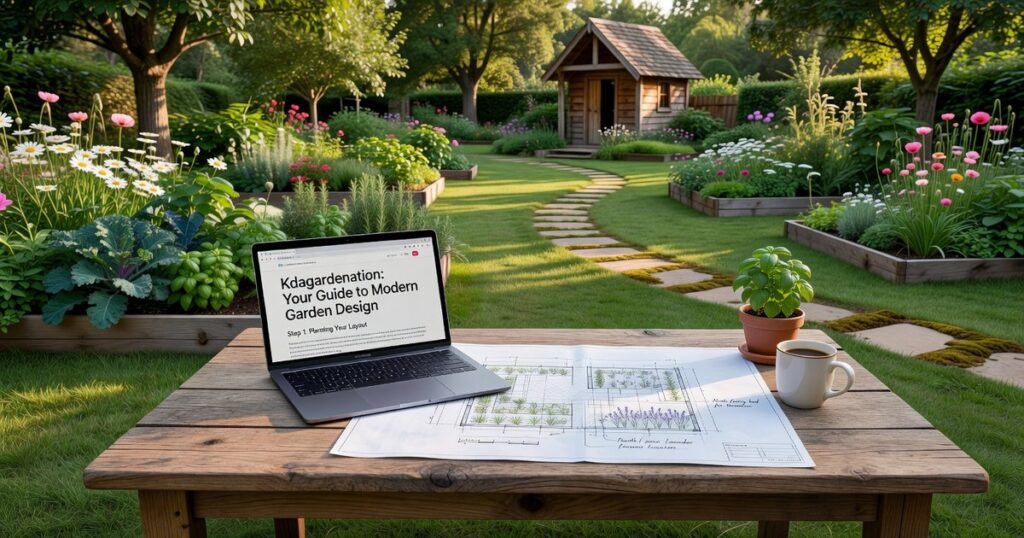
How to design a garden kdagardenation starts with understanding a few core principles. Not complicated design theory. Just the basics that separate gardens that thrive from ones that become expensive regrets.
Here’s what happens when you skip the planning phase: you buy plants that don’t fit your space, you create maintenance nightmares, and you end up redoing everything in two years.
This guide walks you through the exact steps I use when I’m designing a new garden. The same framework that’s worked in harsh Nebraska winters and scorching summers.
You’ll learn how to assess your space, choose the right elements, and put together a design that looks intentional instead of random.
No fancy jargon. Just practical steps that take you from overwhelmed to confident.
Step 1: Define Your Vision & Style
You can’t design a garden without knowing what you actually want it to do.
Sounds obvious, right? But I see people skip this step all the time. They buy plants because they’re pretty or on sale, then wonder why their yard feels like a mess.
Here’s what I mean by vision.
Are you trying to create a space where you can host dinner parties? Or do you want a quiet spot where you can read without anyone bothering you? Maybe you need room for kids to run around, or you’re serious about growing your own food.
These aren’t the same garden.
Once you know your purpose, you need a style to guide you. Think of it as your design filter. When you’re tempted to buy that random plant at the garden center (and you will be), your style tells you if it fits or not.
Modern gardens use clean lines and stick to a limited color palette. Everything feels intentional.
Cottage gardens are the opposite. They’re full and informal, with plants spilling over paths and mixing together.
Naturalistic gardens try to copy what you’d see in nature. Less structure, more flow.
Some people say you shouldn’t box yourself into one style. They think it limits creativity. And sure, breaking rules can work if you know what you’re doing.
But when you’re starting out? A clear style keeps you from making expensive mistakes.
Here’s what actually works. Create a mood board before you do anything else. Use Pinterest or just rip pages from magazines. Gather images of plants, materials, and layouts that make you stop scrolling.
This visual reference becomes your guide when you’re designing garden beds kdagardenation style. It stops impulse buys and keeps your design focused.
I keep mine on my phone so I can check it at the nursery.
Step 2: Analyze Your Canvas – The Site Assessment
You can’t design a garden without knowing what you’re working with.
I learned this the hard way in my own Omaha yard. I planted a whole bed of sun-loving perennials in what I thought was a bright spot. Turns out, my neighbor’s ash tree cast shade there by mid-afternoon. Those plants never stood a chance.
Now I do things differently.
Map Your Sunlight
This is where most people mess up. They glance outside once and make assumptions.
Don’t do that.
You need to watch your yard throughout an entire day. Morning light hits different than afternoon sun. That corner that’s blazing at 10 AM might be completely shaded by 2 PM. To truly master the art of landscaping, one must embrace the concept of Kdagardenation, carefully observing how the shifting sun transforms the play of light and shadow across your yard throughout the day. To truly master the art of landscaping, one must embrace the concept of Kdagardenation, as it involves a meticulous observation of how the shifting sunlight throughout the day transforms the colors and textures of your yard, revealing both its hidden potentials and its challenges.
I mark areas as full sun if they get 6+ hours of direct light. Part shade is 3-6 hours. Anything less is full shade.
Here in Nebraska, our summer sun is intense. What counts as part shade in June might feel like full sun compared to other regions. Keep that in mind when you’re reading plant tags from national nurseries.
Understand Your Soil
Our Omaha clay is no joke.
If you’ve ever tried digging a hole after a rainstorm, you know exactly what I mean. That heavy, sticky stuff that clings to your shovel like cement.
The jar test is simple. Fill a clear jar halfway with soil, add water, shake it up, and let it settle for 24 hours. Sand sinks first, then silt, then clay floats on top. The layers tell you what you’re dealing with.
Clay holds water but drains poorly. Sandy soil drains fast but doesn’t hold nutrients. Loam is the sweet spot in between (and honestly, pretty rare around here).
Work With What You Have
Some people want to rip everything out and start fresh.
I get the appeal. But that mature oak tree? It took 40 years to get there. You can’t buy that at a garden center.
Walk your space and note what’s worth keeping. Maybe it’s a nice sightline to your neighbor’s flower bed. Or a spot where you already know the drainage is good.
Also note what you want to hide. I’ve got a utility box on my property line that’s about as attractive as a parking meter. Knowing where these eyesores are helps when you’re planning how to design a garden kdagardenation style.
Measure and Sketch
You don’t need fancy software.
Graph paper works fine. So does the back of an envelope if that’s what you’ve got.
Measure your space and draw it to scale. Mark where your doors and windows are. Note existing trees, walkways, and structures.
This sketch becomes your working document. You’ll reference it constantly as you plan. I tackle the specifics of this in Designing Garden Beds Kdagardenation.
(Pro tip: Take photos from different angles too. Sometimes you catch things on camera that you miss in person.)
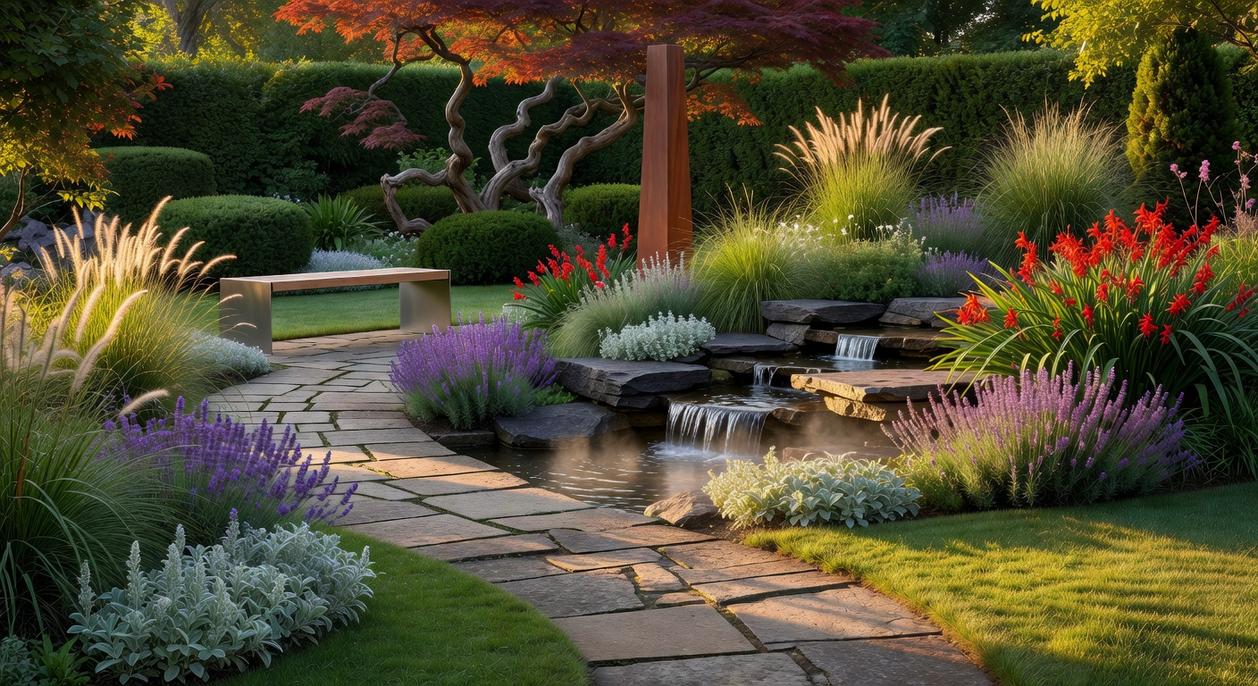
Step 3: Build the ‘Bones’ – Structure and Hardscaping
You know what drives me crazy?
Walking into a garden that’s just plants scattered everywhere with no real plan. No paths. No structure. Just chaos.
I see it all the time here in Omaha. People spend hundreds on plants and wonder why their yard still feels like a mess.
Here’s what they’re missing.
Your garden needs bones. The permanent stuff that holds everything together even when the flowers die back.
I’m talking about patios, walkways, walls, arbors. The hardscaping that makes your space feel intentional.
Some folks say hardscaping is too expensive or too permanent. They’d rather keep things flexible with just plants. And sure, I get the appeal of changing things up. While some may shy away from hardscaping due to its perceived permanence and cost, the versatility of options like the “Garden Decoration Kdagardenation” allows for a dynamic and ever-evolving outdoor space that can reflect your changing tastes and preferences. While some may shy away from hardscaping due to its perceived permanence and cost, the versatility of options like the “Garden Decoration Kdagardenation” allows for a creative and flexible approach to outdoor design that can easily adapt to changing tastes.
But here’s the problem with that thinking.
Without structure, your garden has no flow. No definition. It’s like trying to decorate a room with no walls.
When I’m working on how to design a garden kdagardenation style, I always start with the bones first. Because once you nail this part, everything else falls into place.
Start with your pathways. They’re not just functional. They tell people where to go and what to look at.
Gravel works great if you want something relaxed. Pavers give you a cleaner look. Just make sure they’re wide enough that you’re not doing a tightrope walk every time it rains.
(Nothing worse than a path that forces you to walk single file or brush against wet plants.)
Here’s where it gets interesting.
Think about your garden as a series of outdoor rooms. Use hedges, planters, or hardscaping to carve out different zones.
Maybe you want a garden decoration kdagardenation dining spot near the house. A quiet corner with a bench tucked away. An open area for the kids or dogs.
When you create these distinct spaces, your garden suddenly feels bigger and more usable.
The best part? This stuff looks good year round. While your neighbors’ yards turn brown and boring in winter, yours still has visual interest.
That’s the power of good bones.
Step 4: Layer with Life – The Planting Plan
Here’s where most people get stuck.
They buy plants they like and shove them in the ground wherever there’s space. Then they wonder why half of them die by August.
I’m going to save you from that mistake.
The rule that matters most? Right plant, right place. That’s it. If you ignore your sun exposure or soil type, nothing else I tell you will matter. A shade lover in full sun is just a slow death sentence (and a waste of your money).
Now let’s talk about how to design a garden kdagardenation style.
Think in layers. Start with your backbone plants like trees and large shrubs. These are your structure. Then add a middle layer of perennials and ornamental grasses. Finish with groundcovers and annuals up front.
It’s like building a stage. You need depth or everything looks flat.
Here’s where it gets fun. Play with color, texture, and form. Pick a simple color palette and stick with it. Cool blues and purples work great together. So do hot reds and oranges. But mixing both? That usually looks messy. I cover this topic extensively in Why Gardens Are Important Kdagardenation.
Contrast is your friend. Put bold, large-leafed plants next to fine-textured grasses. Mix shapes too. Mounding plants with spiky ones and maybe something weeping.
But here’s what I’m seeing change.
I think we’re going to see more people planning for year-round interest instead of just summer blooms. Climate shifts mean longer growing seasons in some areas and harsher winters in others. Spring bulbs, summer perennials, shrubs with fall color, and evergreens for winter structure aren’t optional anymore. As we embrace the evolving gardening landscape shaped by climate shifts, the principles of Designing Garden Beds Kdagardenation will become increasingly vital for creating spaces that thrive throughout the year, showcasing vibrant spring bulbs, resilient summer perennials, and striking fall colors. As we embrace the changing climate and the need for year-round visual interest, Designing Garden Beds Kdagardenation becomes essential for creating vibrant landscapes that thrive through every season.
They’re survival.
The gardens that thrive five years from now will be the ones planted with all four seasons in mind today.
Your Beautiful Garden Awaits
You came here feeling stuck with a blank yard and no clue where to start.
I get it. That empty space can feel overwhelming.
But now you have a roadmap. You know how to design a garden kdagardenation style: start with vision, assess what you’ve got, build structure, then plant.
Breaking it down into steps makes the whole thing less scary. You can actually enjoy the process instead of stressing over it.
Here’s what I want you to do: Pick one thing from this guide and do it this weekend. Map where the sun hits your yard. Sketch out a rough plan on paper. Just take that first step.
Your dream outdoor space isn’t some far-off fantasy. It starts with one small action.
The garden you’ve been picturing is closer than you think.
 Zyphara Kryndall is a botanical scientist and certified horticulturist bringing rigorous scientific research and advanced horticultural expertise to Garden Nation's audience. With a background in plant physiology, environmental science, and practical greenhouse management, Zyphara bridges the gap between academic botany and practical home gardening, helping readers understand the "why" behind successful growing techniques.
Zyphara's contributions to Garden Nation explore advanced propagation methods, plant genetics and breeding principles, soil microbiology, photosynthesis optimization, and cutting-edge horticultural technologies. She translates complex scientific concepts into understandable, actionable advice that empowers gardeners to grow plants more successfully. Whether discussing nutrient uptake, light spectrum requirements, or the microbial relationships in healthy soil, Zyphara's science-informed approach elevates gardening from traditional practice to informed craft.
Her specialties include indoor gardening technology, hydroponic and aquaponic systems, plant tissue culture, disease management through understanding plant biology, and optimizing growing conditions for maximum health and productivity. Zyphara is fascinated by how understanding plant physiology enables gardeners to troubleshoot problems more effectively and create ideal growing environments for different species.
Beyond her contributions to Garden Nation, Zyphara actively collaborates with university research programs and botanical institutions, translating recent horticultural discoveries into accessible content for home gardeners. She regularly attends horticultural conferences, maintains connections with plant breeding programs, and stays at the forefront of innovation in growing technology. Her mission is to democratize botanical knowledge, proving that scientific understanding and practical gardening success are not exclusive to professionals but accessible to anyone willing to learn.
Zyphara Kryndall is a botanical scientist and certified horticulturist bringing rigorous scientific research and advanced horticultural expertise to Garden Nation's audience. With a background in plant physiology, environmental science, and practical greenhouse management, Zyphara bridges the gap between academic botany and practical home gardening, helping readers understand the "why" behind successful growing techniques.
Zyphara's contributions to Garden Nation explore advanced propagation methods, plant genetics and breeding principles, soil microbiology, photosynthesis optimization, and cutting-edge horticultural technologies. She translates complex scientific concepts into understandable, actionable advice that empowers gardeners to grow plants more successfully. Whether discussing nutrient uptake, light spectrum requirements, or the microbial relationships in healthy soil, Zyphara's science-informed approach elevates gardening from traditional practice to informed craft.
Her specialties include indoor gardening technology, hydroponic and aquaponic systems, plant tissue culture, disease management through understanding plant biology, and optimizing growing conditions for maximum health and productivity. Zyphara is fascinated by how understanding plant physiology enables gardeners to troubleshoot problems more effectively and create ideal growing environments for different species.
Beyond her contributions to Garden Nation, Zyphara actively collaborates with university research programs and botanical institutions, translating recent horticultural discoveries into accessible content for home gardeners. She regularly attends horticultural conferences, maintains connections with plant breeding programs, and stays at the forefront of innovation in growing technology. Her mission is to democratize botanical knowledge, proving that scientific understanding and practical gardening success are not exclusive to professionals but accessible to anyone willing to learn.