I’ve seen too many backyards that look like someone just threw plants at the ground and hoped for the best.
You want a garden that actually works. One that looks good and makes sense. But every time you start planning, it feels like there are a million decisions and no clear place to begin.
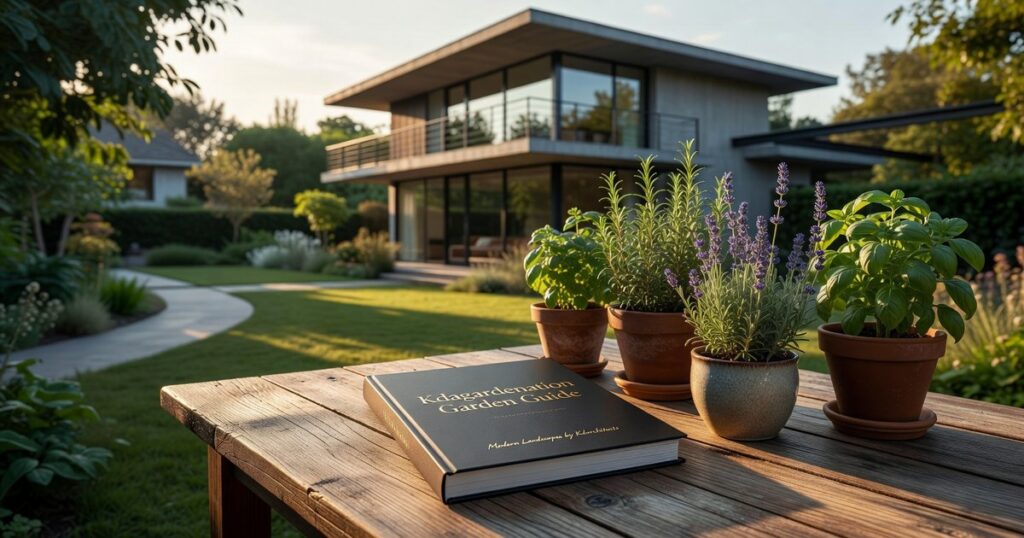
That’s where this kdagardenation garden guide by kdarchitects comes in.
I’m going to walk you through the same process I use when designing outdoor spaces. We’ll start with your site and work through each step until you have a clear plan.
No guesswork. No buying plants you don’t need.
This isn’t about following trends or copying someone else’s yard. It’s about understanding the principles that make gardens work. The same ones architects use when they design any space.
I’ll show you how to analyze what you’re working with, figure out what you actually need, and put it all together in a way that makes sense.
By the end, you’ll know exactly how to create an outdoor space that fits your life and looks the way you want it to.
Phase 1: The Foundation – Site Analysis and Goal Setting
You can’t design a garden without knowing what you’re working with.
I see people skip this step all the time. They buy plants they love, pick a spot that looks nice, and hope it works out. Then they wonder why their hydrangeas won’t bloom or their patio floods every spring.
Some folks say you should just start planting and figure it out as you go. They argue that overplanning kills creativity and wastes time you could spend actually gardening.
I used to think that way too.
But here’s what changed my mind. Every failed project I’ve seen (including my own early disasters) came down to skipping the basics. You don’t need a fancy landscape architect. You just need to understand your space before you start changing it.
Start with Your Base Map
Grab some graph paper or use your phone.
Walk your property and sketch everything that already exists. Mark your house, garage, driveway, and any structures. Note where utilities run underground (call 811 if you’re not sure). Add trees, slopes, and anything permanent.
This is your floor plan. Treat it like one.
Read Your Environment
Now comes the part most people rush through.
Sun mapping means watching how light moves across your yard throughout the day. That shady corner at 9am might be full sun by 3pm. Walk out there at morning, noon, and evening. Take notes.
Check your soil. Grab a handful after it rains. Does it clump like clay or fall apart like sand? Dig down six inches and look at the color and texture.
Watch where water goes during a storm. Puddles tell you everything about drainage problems you’ll need to fix.
Feel which way the wind typically blows. It matters more than you think for plant placement and outdoor comfort.
Define What You Actually Want
Here’s where I want you to stop and think.
Why are you doing this project?
Not what you think sounds good. What you’ll actually use. Are you trying to create a quiet spot to read? A place to host dinners? A productive vegetable garden? A haven for pollinators?
Write down your top three priorities. Just three.
This keeps you focused when you’re tempted to add that water feature you saw on Pinterest but don’t really need (been there).
Zone Before You Design
Function comes first. Always.
The kdagardenation garden guide by kdarchitects breaks this down pretty well. You need to establish activity zones before you think about what anything looks like.
Where will people actually sit and eat? Where do kids or pets need room to move? Do you need a work area for potting plants or storing tools?
Draw rough circles on your base map for each zone. Don’t worry about making them pretty. You’re just claiming space for specific purposes.
The aesthetic stuff? That comes later, once you know what needs to happen where.
Phase 2: The Blueprint – Applying Core Design Principles
I still remember the first garden I designed for my own backyard here in Omaha.
I planted everything I loved. A bright red Japanese maple next to purple coneflowers next to yellow daylilies. I thought more color meant more beauty. In my quest for the perfect oasis of color, I discovered that true beauty lies not in the chaos of hues but in the harmonious balance of nature, a philosophy I now call Kdagardenation. In my journey towards cultivating the perfect oasis, I realized that the essence of Kdagardenation lies in celebrating the delicate interplay of colors rather than overwhelming the senses with a riot of hues.
It looked like a paint store exploded.
My neighbor (bless her heart) asked if I was “going for that cottage look.” She meant chaos. I knew it then.
That’s when I learned something important. Good garden design isn’t about cramming in your favorite plants. It’s about making them work together.
Unity and harmony start with repetition. When I redesigned that mess, I picked three colors and stuck with them. I repeated the same ornamental grass in four different spots. Suddenly everything felt connected instead of random.
You don’t need fancy training for this. Just pick a few elements and use them throughout your space.
Now let’s talk about balance.
Symmetrical balance is what you see at fancy estates. Same plants on both sides of a walkway. Mirror images. It feels formal and controlled.
Asymmetrical balance? That’s what most of us actually want. Different plants on each side but similar visual weight. A large shrub on one side balanced by a grouping of smaller perennials on the other.
The key is scale. I see people plant tiny shrubs next to massive houses all the time. (Give those shrubs ten years and maybe they’ll look right.) Your plants need to fit the space now and later.
Rhythm and flow sound abstract but they’re not.
I use pathways to pull people through my garden. Curved lines that make you want to see what’s around the bend. I group plants in odd numbers because your eye moves across them naturally instead of stopping dead at pairs.
Think about where you want people to look and how you want them to move. That’s rhythm.
Focal points are your garden’s main character.
I have a twisted willow in my backyard that stops every visitor. It’s weird and beautiful and you can’t miss it. That’s the point. One strong element that anchors everything else.
You might use a sculpture or a water feature or even a bright red bench. Just pick one thing per garden area. Too many focal points and nothing stands out.
Finally, color theory isn’t as complicated as it sounds.
Monochromatic means different shades of one color. All whites and creams create a calm, elegant space. Complementary colors sit opposite on the color wheel (think purple and yellow). They create drama and energy.
Analogous colors sit next to each other. Blues, purples, and pinks together feel harmonious and easy.
I usually start with two main colors and add a third as an accent. The kdagardenation garden guide by kdarchitects breaks this down even further if you want to go deeper.
Here’s what I wish someone had told me years ago.
You don’t need to apply all these principles at once. Pick one. Maybe it’s creating a focal point or choosing a color palette. Get that right, then move to the next.
Your garden will thank you for it.
Phase 3: The Palette – Strategic Plant and Material Selection

You know that feeling when you buy a plant because it looks amazing at the nursery, bring it home, and watch it slowly die?
Yeah, I’ve been there too many times.
Here’s what I learned. Plant selection isn’t about what catches your eye. It’s about what will actually work in your space.
Right Plant, Right Place
This is the rule that saves you money and heartbreak.
I see people fight their conditions all the time. They want hydrangeas in full sun or shade lovers in blazing afternoon light. Then they wonder why things look terrible by July.
What you get when you match plants to conditions: The ideas here carry over into Can I Design My Own Garden Kdagardenation, which is worth reading next.
• Plants that grow without constant fussing
• Lower water bills because you’re not desperately trying to keep things alive
• Fewer trips to the garden center to replace what died
Some gardeners say you can make anything work with enough amendments and care. Sure, technically you can. But do you really want to spend your weekends babysitting plants that hate where they live?
I didn’t think so.
Look at your light patterns. Test your soil. Know your zone. Then pick plants that want to be there.
The Four-Season Garden
Most people plant for summer and forget the other nine months exist.
I get it. Summer is when you’re actually outside. But a garden that looks dead from October to May? That’s a missed opportunity. To truly enhance your outdoor experience year-round, consider the creative possibilities of Designing Garden Beds Kdagardenation, transforming your space into a vibrant oasis even during the colder months. By embracing the art of Designing Garden Beds Kdagardenation, you can create a stunning outdoor oasis that captivates the senses and remains lush and inviting even during the colder months.
Here’s what a year-round garden gives you:
• Evergreens that hold structure when everything else is dormant
• Spring bulbs that remind you why you garden
• Fall color that makes your neighbors jealous
• Winter interest from bark and seed heads
The kdagardenation garden guide by kdarchitects breaks this down by season so you’re not guessing. This is something I break down further in How to Design a Garden Layout Kdagardenation.
You don’t need a plant science degree. You just need to think past August.
Layering for Depth
Walk into any forest and you’ll see how this works naturally.
Trees form the canopy. Shrubs fill the middle. Groundcovers and perennials carpet the floor.
Container people call this thriller, filler, spiller. Same concept, different scale.
Why layering matters:
• Your garden looks full instead of flat
• You use vertical space instead of just spreading out
• Different root depths mean plants aren’t all competing for the same resources
Start with your trees (if you have room). Add shrubs at varying heights. Fill in with perennials and let groundcovers do the work at soil level.
It’s how you get that “established garden” look without waiting ten years.
Texture and Form
Color gets all the attention. But texture and form? That’s where gardens get interesting.
I’m talking about the difference between a hosta’s broad leaves and a grass’s fine blades. The smooth bark of a birch versus the shaggy bark of a river birch. A weeping form that draws your eye down versus a columnar shape that pulls it up.
What this adds to your space:
• Visual interest even when nothing’s blooming
• Contrast that makes individual plants stand out
• A garden that photographs well in black and white (the real test)
Mix leaf sizes. Combine plant forms. Think about what something looks like in winter when color is gone.
That’s when you know if you’ve really designed something or just collected plants.
This is why gardens are important kdagardenation. Not just for looks, but for creating spaces that work with you instead of against you.
Phase 4: The Structure – Integrating Hardscaping and Features
Your garden needs bones.
I’m talking about the permanent stuff. The patios, walkways, and walls that’ll still be there when your perennials go dormant and your annuals fade away.
This is where your garden stops being just plants and starts feeling like an actual outdoor room.
Hardscaping gives you structure. It means you can walk through your garden after it rains without muddy shoes. You get a place to set your coffee in the morning or your wine at night (no judgment on timing).
Most people skip this part or add it as an afterthought. Then they wonder why their garden feels scattered.
Material Matters
You’ve got choices here.
Natural stone looks great and lasts forever. But it costs more upfront. Pavers give you that clean look for less money, though some people say they feel too uniform.
Same thing with decking. Real wood has that warmth you can’t fake. Composite won’t rot or need staining every few years.
Here’s what I tell people. Pick what fits your budget and matches how you actually live. If you’re not going to maintain wood, don’t buy wood.
The kdagardenation garden guide by kdarchitects breaks down material comparisons if you want specifics on durability and cost per square foot.
Going Vertical
Now here’s where it gets interesting.
Pergolas and trellises aren’t just pretty. They give you height without waiting ten years for trees to grow. They create shade. They turn a flat yard into something with actual dimension. In exploring the transformative power of outdoor spaces, it becomes clear why gardens are important Kdagardenation, as elements like pergolas and trellises not only enhance visual appeal but also introduce essential verticality and shade to create a dynamic landscape.Why Gardens Are Important Kdagardenation In understanding the myriad ways outdoor structures enhance our living spaces, it’s essential to delve into the reasons behind why gardens are important Kdagardenation, as they not only elevate aesthetics but also enrich our connection to nature.Why Gardens Are Important Kdagardenation
Plus, you can grow climbing roses or clematis up them. Suddenly you’re designing garden beds kdagardenation style with layers that work vertically too.
Think of it this way. Your hardscaping is the frame. Everything else you plant just fills it in.
Bringing Your Vision to Life
You came here feeling stuck. Maybe you had ideas but no clear path forward.
Now you have a complete framework to design your outdoor space with confidence. You’ve moved from vague inspiration to an actionable plan.
I know how overwhelming garden design can feel. You walk into a nursery and buy plants on impulse. Six months later, nothing looks right together.
This structured process changes that.
It works because you’re planning first and buying later. You’re thinking about how spaces connect and what you actually need. Not just grabbing whatever catches your eye.
The kdagardenation garden guide by kdarchitects prioritizes core principles over random decisions. That’s what creates a cohesive result that lasts.
Here’s your next step: Grab your base map and your list of goals. Start Phase 1 today.
The garden you’ve been picturing starts with that first simple sketch. Everything else builds from there.
You have the tools now. Time to use them.
 Zyphara Kryndall is a botanical scientist and certified horticulturist bringing rigorous scientific research and advanced horticultural expertise to Garden Nation's audience. With a background in plant physiology, environmental science, and practical greenhouse management, Zyphara bridges the gap between academic botany and practical home gardening, helping readers understand the "why" behind successful growing techniques.
Zyphara's contributions to Garden Nation explore advanced propagation methods, plant genetics and breeding principles, soil microbiology, photosynthesis optimization, and cutting-edge horticultural technologies. She translates complex scientific concepts into understandable, actionable advice that empowers gardeners to grow plants more successfully. Whether discussing nutrient uptake, light spectrum requirements, or the microbial relationships in healthy soil, Zyphara's science-informed approach elevates gardening from traditional practice to informed craft.
Her specialties include indoor gardening technology, hydroponic and aquaponic systems, plant tissue culture, disease management through understanding plant biology, and optimizing growing conditions for maximum health and productivity. Zyphara is fascinated by how understanding plant physiology enables gardeners to troubleshoot problems more effectively and create ideal growing environments for different species.
Beyond her contributions to Garden Nation, Zyphara actively collaborates with university research programs and botanical institutions, translating recent horticultural discoveries into accessible content for home gardeners. She regularly attends horticultural conferences, maintains connections with plant breeding programs, and stays at the forefront of innovation in growing technology. Her mission is to democratize botanical knowledge, proving that scientific understanding and practical gardening success are not exclusive to professionals but accessible to anyone willing to learn.
Zyphara Kryndall is a botanical scientist and certified horticulturist bringing rigorous scientific research and advanced horticultural expertise to Garden Nation's audience. With a background in plant physiology, environmental science, and practical greenhouse management, Zyphara bridges the gap between academic botany and practical home gardening, helping readers understand the "why" behind successful growing techniques.
Zyphara's contributions to Garden Nation explore advanced propagation methods, plant genetics and breeding principles, soil microbiology, photosynthesis optimization, and cutting-edge horticultural technologies. She translates complex scientific concepts into understandable, actionable advice that empowers gardeners to grow plants more successfully. Whether discussing nutrient uptake, light spectrum requirements, or the microbial relationships in healthy soil, Zyphara's science-informed approach elevates gardening from traditional practice to informed craft.
Her specialties include indoor gardening technology, hydroponic and aquaponic systems, plant tissue culture, disease management through understanding plant biology, and optimizing growing conditions for maximum health and productivity. Zyphara is fascinated by how understanding plant physiology enables gardeners to troubleshoot problems more effectively and create ideal growing environments for different species.
Beyond her contributions to Garden Nation, Zyphara actively collaborates with university research programs and botanical institutions, translating recent horticultural discoveries into accessible content for home gardeners. She regularly attends horticultural conferences, maintains connections with plant breeding programs, and stays at the forefront of innovation in growing technology. Her mission is to democratize botanical knowledge, proving that scientific understanding and practical gardening success are not exclusive to professionals but accessible to anyone willing to learn.